Monday, December 12, 2011

Harvest Monday Dec 12

I am posting this with my iPhone. It would be more exciting if I could figure out how to add pictures with it. Oh well. I finally got started on seeds for my fall/winter garden (perfect timing eh? Amazing how much time and energy you can lose to a divorce). I have some tiny kale seedlings along with some chard. I am excited because they are cool varieties (seeds are my pokemon - gotta cath them all). The kale is a genetic mix called 'extremist agreements' made by an adventurist seedman who allowed his hardiest kale plants to cross freely. I am in love with male and look forward to selecting some keepers out of this material. The chard is lolla rossa - an all purple variety. I love crazy colors.

So soon I'll have my garden back in production. For now I am 'scavenging'. I let some greens go to seed in spring, so I clipped some arugula, mustard, and chard from that. 3 oz worth. I had also planted some Jerusalem artichokes in spring. When catalogs say "drought tolerant, plant it and forget it", they are not thinking of the Valley. I fried those suckers by mid-August. I did not expect much, but I checked under one of the stalk stumps for kicks. Monster! I got 1 lb 9 oz of usable tubers from that single original tuber. It's more impressive with pictures.

New estimation of JA's: great. Which is good because I hear you can't get rid of them.

Sunday, November 20, 2011

Harvest Monday November 29, 2011

Belated...

The harvest this week was small. Lots of things around here are in upheaval so gardening has taken a back seat. With the temperatures dropping I decided to take out the eggplants and the two little minibell pepper plants. That constitutes my entire "harvest" for the week.


Still, it does feel satisfying to get something out of the garden.


3 oz mini bell peppers


3 lb 1 oz eggplant

Monday, October 24, 2011

Harvest Monday - October 24th

I've pulled out most of my summer plants - all but one of the tomatoes, the melon, the beans (which never really produced anyway). All that's left as I turn things over to fall crops are:

the lovely bell-pepper shaped, small tomatoes of unknown variety. I love them and am saving seed, which I'll happily share. Here are 20 tomatoes, weighing in at about a pound total. They are quite meaty for a tomato of this size. They got good reviews in my office tomato tasting (I don't like the flavor of fresh tomatoes). I love them dried.

I got 2 lb 3 oz of eggplants off the two plants and they are still producing like mad. The variety is Kyoto, purchased as seedlings. I will try to save seed from them as well.


2 lb 5 oz of Pool Ball summer squash. I'm pretty sure this is a hybrid but I'm saving seed anyway to see if I can craft an open pollinated version. I love this squash and will grow it again if I can. It's a world away from zukes or yellow crooknecks. Delicious and smooth, not at all watery.


I used some of the squash, a sundried tomato sausage, and a can of my own chopped tomatoes with garlic, herbs, and wine, to make this for dinner. It was divine.


Last, but not least, I've been enjoying all the visitors to my garden. Most of my neighbors (my lot is very urban) employ pest control companies. I like to think of my yard as a haven for any bugs that make it out safely.


Monday, August 29, 2011

Harvest Monday August 29th

I've been on vacation. My fabulous and generous sister took me to Oregon to the Shakespeare festival. We had an excellent time and saw many plays and ate delicious food, but that's a story for another venue. Pertinent to the garden is the fact that I wasn't home to harvest much and haven't been online to post.

Matt harvested a melon while I was gone and dutifully weighed it. When I got back home, there was a lot to pick, both tomatoes and cantaloupes. Some things had gone a little past their best, and were fed to the appreciative rabbits. Here is what was left:

These are the huge Sunset's Red Horizon tomatoes. Impressive, but I don't think I'll grow them again. Too big for me. It seems to give them more time to split, or be eaten by pests or sag onto the ground and rot. I have seeds, if anyone else is game. They've got great flavor and seem to be good for either sauces or slicing onto sandwiches. Just not my type, is all.


Here is a mix of smaller tomatoes.


This is the melon that ripen in perfect time to bring on our trip. I was very proud to bring something I'd grown myself. The flavor was divine.


Our little rental had a garden patio with a cute little bistro set. Here is breakfast the first morning: tea and melon and (not pictured) yummy biscotti I'd made with some dried peaches from the farmer's market.


melons: 14 lb 5 oz

tomatoes: 6 lb 1 oz


Monday, August 8, 2011

Harvest Monday August 8

This week's most exciting harvest was grapes! I've never grown grapes before (among so many other things). I planted Cayuga, Autumn Royal, Thompson Seedless, and an unnamed black wine grape. Only the Cayuga produced this year, which is more than I expected for such young vines.


They are yummy, but not seedless. This makes me realize how spoiled I am.


Another item of interest: I love the poolball (or is it 8 Ball?) squash I've been growing, much more than any other summer squash I've had. So, naturally, I let a couple of fruits alone to mature. They are huge now. I picked this one to see if the seeds are ready. Since allowing them to pass softball size, the plant had not been producing any more new fruits. Now that they are large and hard-skinned, the plants have started to flower again. The odd thing is, the new fruits are bright yellow, like crookneck squash, with dark green rims around the blossom and stem ends. Previous fruits had been a light green. Very strange.


Anyway, I didn't count the weight of the large squash, since I'm not planning to eat it, but I will count the weight of the dried seed. I've decided seed-weight is fair, since most of my garden costs come from seed purchases.


This week's totals:
7 oz squash
14 oz grapes
1 lb 1 oz tomatoes
4 oz eggplant


Yearly totals:
2 lb 14 oz greens
60 lb oranges
13.5 oz kumquats
13 lb cherries
14.5 oz radish pods
8 oz peas
9 lb 9 oz tomatoes
11 lb 12 oz squash
14 oz garlic
4 lb 1 oz new potatoes
2 oz herbs
2.5 oz onions
1 lb 5 oz ornamental plums
16 lb cultivated plums
4 lb elderberries
14 oz grapes
1 lb 1 oz eggplant


Don't let anyone dismiss your attempts at gardening. If I can do it, without prior experience, capital, chemical inputs, or much physical effort, you certainly have an excellent chance. To see some really impressive harvests, visit Daphne's Dandelions


Saturday, August 6, 2011

Winemaking adventures: Racking

New wine spends a week or two in the primary fermenter (bucket, on the home winemaking scale of production). During this time, fermentation is fast and furious and you can hear the contents fizzing like a newly opened can of soda. If you are making wine using fruit or grapes as opposed to juice, this is when the yeast is eking out every possible bit of flavor and sugar out of the solids. When fermentation dies down somewhat, the remains of the fruit can be removed and the wine is transferred into a secondary fermenter (glass carboy, for many of us) to finish fermenting. Primary fermentation can handle exposure to air because the yeast is going strong. Secondary fermentation limits the exposure to air, or you'd end up with vinegar.

Here's how this segment goes:

At the beginning of this batch, there was so much fruit in the bucket, I couldn't fit as much water and sugar as I needed to for the recipe. In fact, I had to take out some of the juice after the first day because the wine was bubbling out over the top of the bucket. Now, look how little is left of the fruit in that white mesh bag. The yeast took that fruit apart with relatively little waste. I have it in a colander over a bowl to drain as much liquid out as possible. The soda bottle on the left holds the juice I removed on the second day. The wine bottle holds the remainder of the sugar-water syrup that did not fit in with the fruit in the first place. With the fruit removed, there is plenty of room for both.

Since I added more sugars in the form of the sugar syrup and the unfermented juice, I let the wine stay in the bucket, covered with a dishcloth, for another couple of days until the fermentation died down a little bit again.

Then, I siphoned the wine out of the bucket, into the carboy. It's much better to siphon than pour because a lot of the solids that the yeast pulled out of the fruit settle to the bottom of the bucket (and later, will continue to settle out in the carboy as well). Racking the wine off these lees will help the flavor; leaving it on the lees can cause it to taste "off". In addition to solids from the original fruit, the husks of dead yeast cells also settle out. You don't want your wine to taste like dead yeast.

The easiest way I find to start the siphon is to hold the tubing with both ends up and fill it with water. Then I put my thumb over one end and lower it into the container I'm filling and the other end into the wine. When I let the pressure off the lowered end, it runs just fine.


I also racked the cherry wine, because it had dropped a lot of sediment as well. I made this wine with fresh cherries, which I mashed and dumped into the mesh bag, pits and all. When the primary fermentation was over, there was little left in the bag but skins and pits, so there are a lot of fruit solids in this wine which will need to settle out.
The frustrating part is how much wine is lost when there is a lot of settling like this. I had to stop about three inches from the bottom of the carboy, as the siphon was starting to pick up sediment. There are a couple of options to make up the difference when you rack wine. You can either top off with water, or top of with another wine that is similar to the one you are making. I used half water and half merlot.
Now that the wines are racked, I put the airlocks back on and they are back in the hall closet, working their magic in secret.

Monday, August 1, 2011

Harvest Monday August 1

This week was moderately productive, but mostly with summer standbys, tomatoes and squash. I am waiting for my Sunset's Red Horizon tomatoes to ripen. They are enormous, but still green. I decided to let a couple squash fruits to mature so that I can save seed (ok, they got to big to pick and I didn't cut them off), so suddenly my squash vines are not producing any new fruits. Male flowers, but no female ones. Hopefully they won't give up on me completely.

The exciting harvest for the week: the first eggplants! These came from seedlings I bought at OSH, a variety called Kyoto. It produces small fruits on lovely purple-veined leaves.

Hunting up eggplant recipes, since I am a newbie to the vegetable, I found eggplant fries. I followed the recipe loosely.


Flour, garlic powder, onion powder, cayenne, seasoned salt, and freshly ground black pepper.


Skin the eggplants, then slice into fry-shapes, according to your preferences. I like thin fries.


Toss with the flour mixture. This is important - too little flour coating and the fries will end up shriveled and limp. If I did this again, I might go with the traditional egg-and-flour coating. Still, if you get a nice thick coat, they do come out crispy and then you don't have to worry about the egg at all.


Into the oil! (We really shouldn't have a deep fryer. We eat enough bad things without it. But fried food sure is good.)


These were the first fries out, with not enough flour on them. They are all wimpy looking and were not crisp and delicious. Later ones were better but my fingers were too greasy for the camera. Eggplant fries are not as crisp or sturdy as potato fries. They do, however, have lovely creamy centers, since the eggplant inside gets soft and lucious. It was fun for an experiment, but I probably will use my eggplants for something else (healthier) in the future.


This week's harvest


1 lb 12 oz tomatoes
1 lb 3 oz squash
13 oz eggplant

Friday, July 29, 2011

Wine making adventure: mostly plum

Someday, I shall have enough fresh fruit of one kind to make a single-fruit wine. Until then, I make "mostly x" wines. In the hall closet I have mostly apple, mostly cherry, and mostly orange. This time, I had 18 pounds of plums picked from my own tree (one of those dark purple ornamnetal plums) and from a tree on my family's rental property. I also had 6 pounds of elderberries foraged along the riverbank. I had these all chopped up and frozen in gallon ziplock bags, as it wasn't quite enough fruit for a 5 gallon run. I like my fruit wines very fruit-forward, although not very sweet. Some winemaking sources say that a subtler, grape-wine-like wine can be made with other fruits if the fruit-to-water ratio is low. I don't want my fruit wines to taste like grapes, I like them to taste like fruit. I planted grape vines this year for when I want grape wines.

Anyway, the final contribution to my wine was made by my friend Gloria, who bought me a flat of delicious cling peaches. I used 3 pounds of the peaches to round out my wine. Here are the frozen plums and elderberries ready to go, just so you get the idea of how much fruit is required for a 5 gallon batch.


Different fruits vary widely in acids, tannins, and sugars. When I mix fruits in a single batch of wine, I break it down as if I'm making individual gallons when I'm hunting up recipes. There are some very good winemaking books. The Way to Make Wine by Sheridan Warrick and The Home Winemaker's Companion by Gene Spaziani are good ones, particularly if you want to make grape wines. They don't take fruit wines very seriously, but they give a lot of information about the technical process. They can also make winemaking seem intimidating. That is why I also like The Joy of Home Winemaking by Terry Garey. She really takes the intimidation out and also treats fruit wines as a valid beverage in their own right, not as if they are a poor man's alternative to good grapes.


Of course, practically speaking, fruit wines are my alternative to wine grapes. Brew shops sell fresh, frozen, and concentrate wine grapes, but it is expensive, particularly in 5 gallon batches. In summer and fall, a lot of people give fruit away because they have so much.


So, once I know what kind and how much fruit I have, I turn to my favorite online winemaking recipe source, Jack Keller. He can be relied upon to have a recipe for just about any crazy fruit you may have. He had several for plums, elderberries, and peaches. I chose a recipe for plum wine, which called for 6 lb of fruit, a recipe for peach wine which called for 1 lb of peaches, and split the difference between his two recipes for elderberry wine, one calling for 3 lb fruit, one calling for 10. Essentially, I pretended I was making 3 gallons of plum wine, 1 of peach and 1 of elderberry. Why? Well, the plum wine called for added tannin, but the peach and elderberry wine didn't, as those fruits contain enough naturally to produce a balanced wine. Peach, on the other hand, needed relatively little added acid blend, but plum and elderberry needed more. I think treating each fruit separately creates a more balanced final wine.


So, my final, cobbled together recipe looks like this:


17 lb plums
6 lb elderberries
1 lb peaches
11 lb sugar
6 1/2 ts acid blend
3/8 ts tannin
5 ts yeast nutrient
5 ts pectic enzyme
1 packet wine yeast

All the fruit is chopped up, excepting the elderberries which are very small. If you have time, freezing the fruit helps break down the cell walls and makes the yeast's job easier, but it's not necessary.

If you take only one bit of information from this post, it should be this: For a five gallon carboy's worth of wine, you will need a larger than five gallon bucket for your primary fermentation. Helpful people at the brew shop will tell you this and try to sell you a 6.5 gallon bucket when you buy the carboy. Don't be stubborn and figure you can get a cheaper 5 gallon bucket elsewhere. Yeast create a lot of fizz. Think of the head of a pint of beer, then imagine it in a smaller glass. You don't want wine fizz pushing up and over the top of your bucket and all over your floor. Many wines are made with very colorful fruits that are hard to wash away. Just a thought.

Anyway, at this point I put my strainer bag into my 5 gallon bucket (don't be stubborn!). Bagging the fruit makes it much, much easier to remove after the primary fermentation is over. Dump in the fruit:


peaches

elderberries


and plums, which were still frozen. All this fruit made my bucket very full. Doesn't look like I'll need much water. So, I brought a large pot of water to boil, and added the sugar. Normally, you would only boil about half the water you need along with all the sugar, and pour it over the fruit and add the rest of the water cold. Hot water helps start to draw the juices and flavors out of the fruit, but the pectic enzyme can't be added until the mix is room temperature. But I had a lot of fruit which was still frozen, so it cooled down quickly. Once I determined that the mixture was cool enough, I added all the other ingredients except yeast. Properly speaking, the recipe should also include a crushed Campden tablet for every gallon of wine. That kills off any errant strains of yeast or bacteria present. I forgot, so I'll see what happens. Cover the bucket with a clean kitchen towel to keep out dust and flies while allowing airflow.


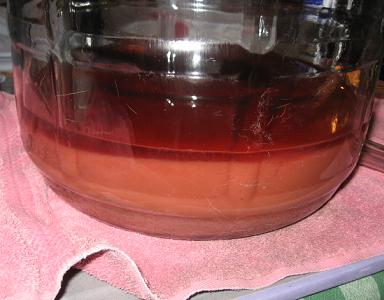
After giving the pectic enzyme 12 hours to do its job (and also allowing the sulphur from the Campden tablets to dissipate somewhat), you can stir in the yeast. After a day or two, the mix will be very bubbly, which pushes the fruit up to the top of the bucket. It will smell a little like wine but look pretty gross. Like this.

Every day, preferably twice a day, you will need to stir the floating fruit back into the liquid. This allows the yeast to keep working on it. Being exposed to air away from the yeast, like the fruit on the top, can give other bacteria a chance to get to work on it. Periodic stirring allows the yeast to colonize and defend every bit of the fruit. Yeast is very good at keeping bad bacteria out of its domain. In a week or so, when the fermentation has slowed down a bit, I will pull out the bag of fruit. Usually I just let it drain and toss the contents. This time, since there was so much fruit, I will press as much liquid out of the must as possible. As it is, I had almost a liter of water-sugar syrup which didn't fit into the bucket to begin with, then I pulled out two liters of juice to avoid overfilling my bucket. Even adding that back in after pulling out the fruit, I will probably be left with less than 5 gallons of liquid to put in the carboy. The difference can be made up with plain water or wine.

I'll post an update when I transfer this batch into the carboy. After that, it's mainly waiting.


Monday, July 25, 2011

Harvest Monday July 25

This was a hectic week. Harvests happened, but not many pictures were taken. The most substantial product of the yard was this SUV on Sunday morning. You can read more about it in detail here. The story involves one parked SUV, one truck with a sleeping driver, and an innocent mailbox. No one was seriously injured (apparently not even the driver, though I imagine he'll be bruised).
One of the two container-grown potato plants got too hot/dry and died. I did salvage about half a pound of tiny new potatoes from it, though. I also picked 3 lb, 14 oz of squash and 2 and a half pounds of tomatoes. You can see those, at least, below, along with farmers market peaches, destined to become a sweet and spicy barbecue sauce.
That brings my totals to

2 lb 14 oz greens
60 lb oranges
13.5 oz kumquats
13 lb cherries
14.5 oz radish pods
8 oz peas
6 lb 12 oz tomatoes
10 lb 2 oz squash
14 oz garlic
4 lb 1 oz new potatoes
2 oz herbs
2.5 oz onions
1 lb 5 oz ornamental plums
16 lb cultivated plums
4 lb elderberries

Friday, July 22, 2011

Seeds: Making and Saving

I think seed saving is very important. For one thing, It's cheaper. The majority of money I have spent on this garden has been for seeds. (The next-highest expense was the $100 or so we used to put up the fence that separates the vegetable garden from the rest of the yard to keep the dogs out). Granted, I do prefer the interesting heirlooms from seed catalogs, which are more expensive, over the cheaper hybrids on the rack at my local hardware store. Now that I have these heirlooms, however, I can save the seed myself and have enough for myself and to share with others for years to come. There is a lot of good seedsaving information online and in books, but I'll share a quick example for saving tomato seed, since tomatoes are so popular with backyard gardeners.

First, needless to say, you have to have seed to save. That can be tricky. In short-season areas, it may be difficult to get mature seed before frost hits and kills the plants or rain comes and makes the drying seed mold. In hot climates, we have a different problem. High heat and pollen don't go together.

Obviously, some plant pollens like high heat more than others. Peppers and tomatoes have pollen that is viable at higher temperatures than, say, cabbages. But even hot-weather vegetables have their limits.

According to a gardening guide published by Colorado State, "Tomato pollination is temperature dependant. If nighttime temperatures drop below 55 degrees, pollen fails to develop and flowers that open the following morning will not set fruit....If the daytime temperature reaches 90 degrees by 10 a.m., blossoms that opened that morning abort."

When I was harvesting the first of my tomatoes, the ones I was so happy to find with few seeds, I didn't consider the temperatures. We'd been having temperatures veering wildly between periods of cold nights and days in the triple digits while those tomatoes were forming. This resulted in smaller tomatoes with few seeds. Now, our weather has settled to what I will tentatively call "normal" as you can see below.


I am also getting larger and seedier tomatoes, as the flowers are being pollinated more thoroughly. It still seems to hot for beans, as I am seeing many bean flowers yet no bean pods. I am collecting more varieties of cowpeas, including the lovely and reliable yardlong bean, since Vigna unguiculata can flourish in higher temperatures than Phaseolus vulgaris. I will also be trying the drought and heat tolerant tepary bean, Phaseolus acutifolius, next year.
What can be done about it now? I notice that flowers are more likely to set fruits in denser plantings, where I assume the shade and humidity keep the temperatures down. So tighter plant spacing may help. Also, I think rigging up a light shade cover might help.

Anyway, here is how I save tomato seeds. I process seeds in a small batch because I don't need thousands of seeds for next year.

The good news is, tomato plants don't need any special treatment to produce seeds (radish plants, for instance, have to be kept in the ground much longer to allow them time to flower and set seed, and they need to be staked to keep them from falling over. They get big). Nor do you have to do anything special with the fruit. It's already ripe with mature seeds.

The bad news is, tomato seeds are covered in a substance that inhibits sprouting. The plant intends for the tomato to fall off and rot before the seeds sprout. For the most successful germination next season, we should mimic that process.

Start by scooping the seeds out of several ripe tomatoes, into a small container. I use a cup measure. You can use the remainder of the tomatoes for something else. Like salsa. Mmm. Anyway, add a little tap water to the slurry in the container. Just a bit. You want a soupy mixture. Now, you're going to let this mixture ferment to break down the germination inhibitors in the tomato gel around the seeds. Cover the container loosely (I stick mine in an unsealed plastic baggie) and make sure it's labeled with the variety you're saving. Set it someplace you won't forget it. You don't want to forget it.


After a couple of days, the mixture in the container will get moldy. It looks gross. This is why you don't want to forget it and find it next month.

Now, add some more water to the container and swish it around a little. The scuzzy stuff will float, as will any nonviable seed. Mature seed will sink to the bottom. Pour off as much scuzz as you can. Then dump the rest into a fine-mesh strainer and rinse the seeds well under running water.

Then spread the cleaned seed out to dry. I like to use paper plates for this. Label the plate, too, so you don't get the seeds mixed up with some other variety (this may provide one more level of insurance against a significant other throwing the plate away). When the seeds are completely dry, they can be stored. If you're not sure whether they are dry enough, leave them out longer. Improperly dried seeds mold. A fully dried seed should snap if you bend it, but few tomatoes have seeds large enough to bend.


Congratulations, you've just saved yourself at least $2.50 on a pack of tomato seeds next year. More likely, you've saved several packs worth of seeds and now can share them with other gardening friends, exchange them for seeds you don't have on GardenWeb's seed exchange, or even sell them through organizations like Seed Saver's Exchange. Seeds vary in their longevity - onion seed is notoriously shortlived - but tomato seeds can last 5 years or more if you store them somewhere cool and dry. Now you'll never have to worry about your favorite tomato variety being bumped out of production by something trendier.

Don't laugh, it happens.

A note on hybrids: Most gardeners are aware that hybrid varieties don't "breed true" - the offspring will not be the same as the parent plant. Most books and articles add, "so hybrid seed is not worth saving." If you are the inquisitive sort, this is complete bunk. It is true that hybrid plants will not produce identical offspring (although seed companies have been known to label true-breeding, open pollinated seeds "hybrid" to discourage seedsaving and encourage customers to buy new seed every year), hybrid tomato plants will still produce tomato seeds. If you grow out the seeds next year, you will be greeted with several different types of tomatoes. You may like one of these new types better and you can develop your own new variety from that plant. Or one of the types might be very similar to the original tomatoes and you can develop your own open pollinated version of the hybrid tomato. For an excellent explanation of this type of plant breeding, see Carol Deppe's Breed Your Own Vegetable Varieties.

Monday, July 18, 2011

Harvest Monday July 18th

This was my best harvest week so far. The tomato plants and the squash vines are churning out a decent take almost daily. I have a lot of tomato plants this year because they managed to survive all the things that went wrong.

Below are the maroon tomatoes that are close to being my favorite variety this year (they tie with the funny bell pepper shaped ones). Unfortunately, neither variety reached me with a name. I will still save seeds.


I don't have a picture of the squash I harvested, but here is a simple dish I made with a couple. I sliced them into thin rounds and fried them in a little bit of butter and a sprinkle of seasoned salt. They were excellent. (The mystery object on the plate is a little onigiri, heated in the pan with a splash of soy sauce.) I had this for breakfast and call it Silver Dollar Squash.


Most of the tomatoes I picked got dried. I leave them rather juicy and store them in the freezer. They will be lovely memories of summer all winter. I want to try a bread dough with chopped dried tomatoes and rosemary. Mmm...


I also did some foraging. I stop by some unused land to gather forage for my rabbits. One place is along a chainlink fence that separates a sidewalk from a steep river bank. Wild grape grows over the fence, and the rabbits like that. Then I noticed that elderberry bushes also lean over the fence. I couldn't resist. I didn't gather enough for straight elderberry wine, but I will add these to a blend.
This is what they'll be blended with. These plums come from an apartment complex my family owns. Ideally, fruit for wine should be perfectly ripe. I am not the best ripe-plum picker, probably because I prefer to eat plums with a little crunch left to them (I know, it's practically sacrilegious). So if you make wine, don't follow my example: pick your fruit perfectly ripe. I also picked some little plums from my ornamental plum tree (one of those with dark purple leaves). It produces dark red plums about twice the size of a cherry with a wonderfully intense, tart-sweet taste. I would absolutely make a wine exclusively from them if I could ever gather enough.


My total for the week:

ornamental plums: 1 lb 5 oz
cultivated plums: 16 lbs
elderberries: 4 lb
tomatoes: 3 lb 3 oz
squash: 3 lb 4 oz


Which brings my total for the year to:

2 lb 14 oz greens
60 lb oranges
13.5 oz kumquats
13 lb cherries
14.5 oz radish pods
8 oz peas
4 lb 4 oz tomatoes
6 lb 4 oz squash
14 oz garlic
3 lb 4 oz new potatoes
2 oz herbs
2.5 oz onions
1 lb 5 oz ornamental plums
16 lb cultivated plums
4 lb elderberries

Sunday, July 10, 2011

Harvest Monday July 11th

This will be a summer of tomatoes. They were the only species not squished by falling grow lights, slurped by slugs, nibbled by bunnies, or attacked significantly by any of the other insect pests I had this year (notably stink bugs and aphids, which I treat by wishing I had chickens). I am hoping for a bumper crop eventually to can and dry. In the mean time, the main producers are two unnamed, smallish-fruited tomatoes that I will probably save seed from and grow next year. I've been grazing off of them for a couple weeks now. Mostly I just quarter or halve them and toss them in a skillet with whatever else I'm cooking.

I also make my family and coworkers eat them raw and report back. I am not a fan of plain, raw tomatoes. Yuck. But I'd like to know what's tasty for seedsaving or sharing.

I decided that the haul above (about 8 oz) qualified as enough to dry. They are in the dehydrator now. I love dried tomatoes. Most of them are the funny, bell-pepper shaped, cherry-size tomatoes that I got from a seed mix. They are very meaty little guys, with few seeds and little gel. That's great for me, since I love tomato sauces, salsas, and dried, all of which favor a dryish tomato. I will definitely save seed. The trouble is there are so few seeds inside. Still, I am determined and will name them and offer them next season.

(As an aside, I am willing to trade seed for any plant I list on this blog, so long as I am able to save them.)

Friday night I realized I didn't have anything to make for my box lunch Saturday. Unfortunately, I had cleaned out the ripe tomatoes in the afternoon and gave them away. I did have some chard and a young onion. I thinly sliced the stems and the onion and sauteed them with a couple of peppers we had left from our last farmers' market trip, as well as some pickled daikon and kohlrabi (also from the market), finished off with a little soy sauce. The greens were roughly chopped and stirred into some rice and quinoa along with the last of the sweet pickled kumquats from Mom's tree.


It was an odd meal. Swiss chard is not my favorite, although it's beautiful. I will grow it again (I have a lovely strain of purple-leaved chard that didn't get planted this year). I may try just eating it in soups and the like in winter, then feeding it to the bunnies over summer. I don't like it well enough for the light sautes of summer fare.


Finally a few more tomatoes and some 8-ball squash went into a pan with some sliced chicken breast and a splash of red wine vinegar. That's summer food at its best.


I do really love this squash. It doesn't seem to have the pithy texture that even young crookneck or zucchini have. Even at the size of a softball, this squash keeps a firm, smooth texture and the seeds are barely noticeable. The bad news is, it's a hybrid. I will try to keep some seeds in hopes of breaking it into an open pollinated variety, but it is growing in my front yard, where large squash tend to get stolen.


If I can't save seed, I may break down and buy it from a company. It's that good. Maybe someone's already dehybridized it in Seed Savers Exchange.


This week, I harvested:
14 oz tomatoes
1 lb 8 oz summer squash
5 oz chard
2 oz onions
3.5 oz garlic


which brings my totals for the year to:
2 lb 14 oz greens
60 lbs oranges (the wine is looking fabulous, by the way)
13.5 oz kumquats
13 lb cherries
14.5 oz radish pods
8 oz peas
1 lb 1 oz tomatoes
3 lb summer squash
14 oz garlic
3 lb 4 oz new potatoes
2 oz herbs
2.5 oz onions


Not bad for only my second year of gardening.

Monday, July 4, 2011

Rabbit Feeding


I don't feed my rabbits pellets. Rabbit pellets, like dog food, are fairly recent on the scene and animals have done fine without them for thousands of years previously. Also, rabbit pellets must be purchased.


Instead, I feed my rabbits good quality hay and assorted greens and vegetables. With ten rabbits instead of two, I find that my yard does not provide enough greens for the bunnies. In addition to what my own property supplies, I forage for them on empty land (caveat: to be entirely on the legal side of the fence, you have to have permission from the property owner to do this, even if you are technically removing invasive weeds).


In springtime, the pickings are easy. In the Central Valley, where we live, springtime runs from about November to March. It's been summer for a while, no matter what the calendar says. Plus, most landownders plow the land in late spring as the weeds start to dry out. Pickings now are slimmer.


Favorites at this time include wild grape as well as the weeds below.


This is purslane. As a succulent, it contains a lot of water, which helps keep bunnies hydrated in hot weather. Also, people can eat it, though I haven't tried.


In the center of the photo above is sow thistle. It starts growing early in the year and is going to seed now. However, the plant stays green even while the seeds are ripe (unlike the trusty mustard family plants the rabbits were eating earlier in the year).


This is prickly lettuce, the forebears of our familiar salad green. They are also starting to go to seed at this time, though they will dry out as their seeds ripen. The bunnies especially seem to love the flower buds at the top of the stalk.


Chicory is a relative of the dandelion, familiar and also beloved of bunnies. I find chicory difficult to identify until it flowers. It has beautiful blue flowers, unlike anything else growing in this area right now. It will bloom through the summer, so I am looking forward to harvesting more of it for the bunnies. When it flowers, it sends up long, leafless stalks for the blooms, with the leaves as a clump at the bottom. Since the rabbits like the leaves best, I pull the whole clump.


These greens help augment what I feed the bunnies out of my own garden, like squash leaves, late radish leaves, dandelions, grasses and clover.

Harvest Monday July 4th


I have summer squash (Pool Ball Hybrid) and assorted tomatoes coming in now. I call them assorted because most are from a mix of seeds I received from Wintersown.org. I love the flavors of summer food. I sliced up the squash and tomatoes, as well as some chicken breast, sauteed it all with a little olive oil, white wine vinegar, salt and pepper. Divine.


Totals this week:


Summer squash: 1 lb 8 oz

Tomatoes: 3 oz.

Monday, June 13, 2011

Harvest Monday

A while back, there were some red and russet potatoes sprouting in my pantry. Usually, I throw such potatoes into my compost pile (where they grow happily in the summer). This time, I dug a pit in the back yard and planted them there. Other than earthing them up a couple times, I totally ignored them. This week, they were looking a little worse for the wear as the weather warmed up and the dogs kept barreling through them. So I checked to see if any had set tubers. Many looked like the plants below.

Perfect new potato size. The whole patch yielded 3 lbs, 4 oz of new potatoes, all washed up below. Some had such delicate skins that washing them stripped the skin right off.


I combined the potatoes with some garlic and herbs from the garden (more herbs and substantially less garlic than in this picture).


I had the roasted potatoes for dinner. Only the olive oil, salt, and pepper were produced off the property. How locavore is that?


In other news, my cayuga grape has two clusters of grapelets. None of the other vines set fruit this year.

And, although I don't have a picture of it yet, the cayuga's unkillable predecessor has actually put up leaves from its base. This was the plant I originally thought was dead, pulled up and tossed into the weeds where it languished for a couple of weeks, then realized that it might still be alive, and replanted in the backyard. It hung on there for a while, still green when I nicked the bark to check, but did not produce any leaf buds. Finally, I found the little branches were dried out and dead. Thankfully, before I could yank the poor thing out of the ground again, I noticed it was growing leaves at the very base of the trunk.


I love unkillable plants. They do well in my yard. I shall add cayuga grape to the list, which already includes Red Russian kale and potatoes.

Totals to date:


39 oz greens

60 lbs oranges (my sister's tree)

13.5 oz kumquats (my mother's tree)

13 lbs cherries (my neighbor's tree)

14.5 oz radish pods

8 oz peas (I'm sure I would have harvested more, but I started feeding the vines to my rabbits)

5.5 oz garlic
3 lbs 4 oz new potatoes

2 oz herbs

.5 oz tiny onion (its stem was broken by a wayward foot, so I went ahead and ate it)